
Now that we have set up our business accounts, in this lesson we will review how to enter or record basic business transactions.
How to Make a New Deposit to Your Business Checking Account
If for some reason, your initial screen shows no assets or equity, you can make a deposit by clicking on Assets. Then click on Current Assets. Then click on Checking Account to select it. Then click Open in the top menu or right click and click Open Account.
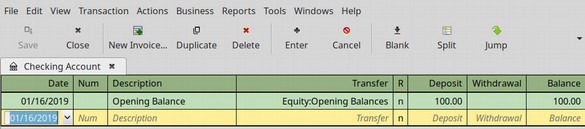
In the yellow box, for the Description column, type Initial Deposit. Then click on the Transfer Column to bring up the Drop Down Arrow box.
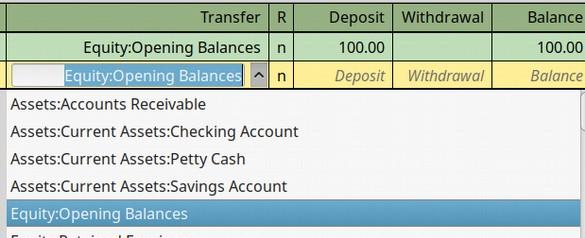
Click Equity Opening Balance so that GnuCash knows what this deposit is being made for. Then in the Deposit column, type 100.00. Then Press Enter. Then press Save. Then press Close.
How to Delete a Transaction
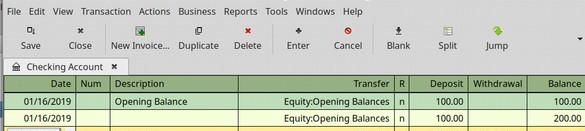
If you made a mistake or want to delete a deposit, just select the row and want to delete a deposit, just select the row and click Delete in the top menu. In case you are wondering what the R and N mean in the table above, the R stands for Reconciled and the N stands for Not Reconciled. At the end of each month, when you get your statement from your bank, you want to review all of your transactions to make sure you and your bank agree on what happened. You then want to click on the N and change it to C meaning that your account has been reconciled with your bank statement. To Save the Changes you made to your checking account, always remember to click SAVE. Then Close.
How to Open Your Chart of Accounts
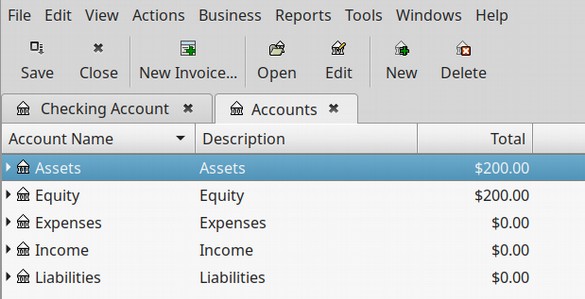
To open your Chart of Accounts, in the top menu click View, New Accounts Page.
How to Customize Your Account Preferences
Before we make any more changes, we will review our Account Preferences. In the top menu, click on Edit Preferences.
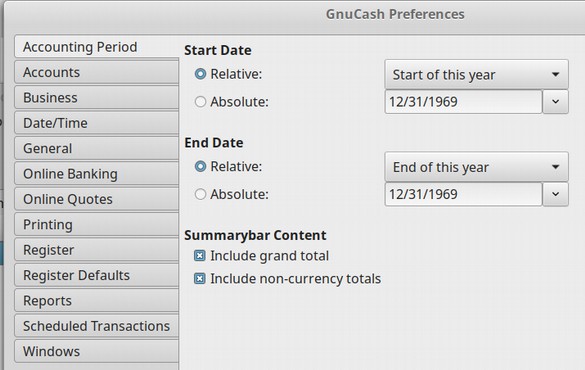
There are just a couple of things we want to change here. Click on Accounts side menu item. Then for Account Color, check the boxes to show the Account Color as background and on tabs. This will help us see our different accounts more clearly. Then click on the Business side menu item. Check the box to Enable Extra Buttons. We can use these buttons later to make custom invoices for our business. Click on the Printing Side Menu and change the default font from 10 to 14. Then click Close.
Customize Your Account Colors
You can change the background color of any account by selecting the account and then clicking on Edit. Then click on the Account Color.
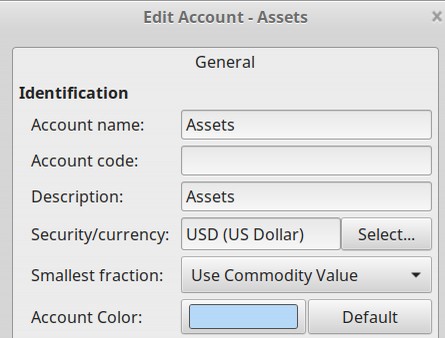
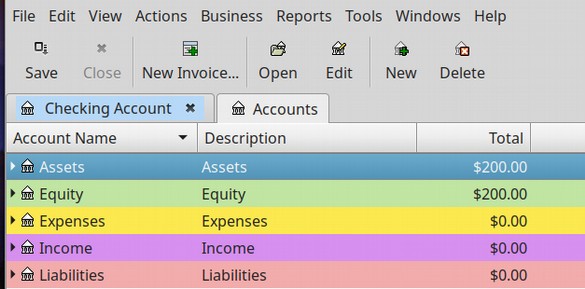
Select the color you want. Then click OK. Here are our Big Five accounts after adding colors to each of them.
Now that we have our top level accounts looking nice, lets add some more accounts made especially for our Lemonade Stand Business.
How to Add New Accounts
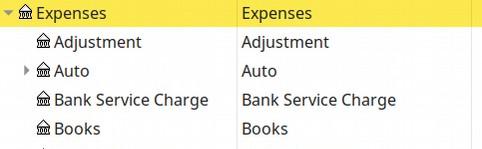
We can customize GnuCash by adding as many accounts as we want. The default Business Chart of Accounts Expenses Category comes with over 20 different types of expenses. 7 of these expense types have sub categories (which have little arrows to the left of their account name – see Auto below).
We want to add a new category for our Lemonade Stand Example Business called Supplies. To add this new account, first select the Expenses Row. Then click New.
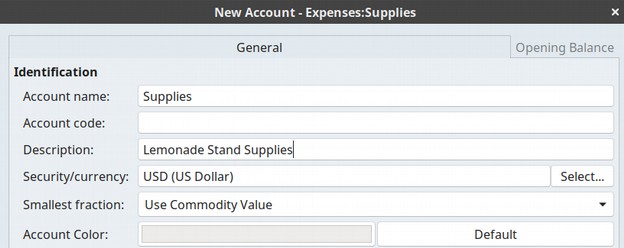
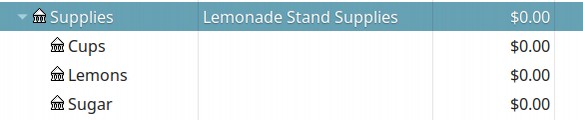
For Account Name, type Supplies. For Description, type Lemonade Stand Supplies. Because this is just a placeholder account in which all expenses will be posted to three sub-level accounts (cups, sugar and lemons), we want to check the Placeholder box. Then click OK. Then on the main accounts page, open the expense category. Then scroll down to Supplies. Then click New to add our first sub-category to this account.
Call this account Cups. Then click OK. Then add an account for Sugar and an account for Lemons. Here is what our Supplies accounts look like when we are done.
What’s Next?
Now that we have set up our Chart of Accounts, in the next lesson we will review how to record purchases and deposits.