
Originally, there were no images on web pages. Just a lot of text. Then in 1992, Tim Bernes Lee placed the first image on the internet. It was a band made up of staff members. Here is a copy of that now famous image:

Images are in some ways even more important than links for your website. This is because many people (more than half of your viewers) are visual learners. They learn more from images than from reading text. Your viewers will learn more and be more likely to recommend your website to others if you make an effort to include several images on every web page. Most of the web pages on my educational websites have an average of ten or more images per web page.
Some courses mistakenly discourage the use of images. They argue that placing many images on your web page will slow down the loading speed. This is true if you fail to compress or reduce the file size of your images before adding them to your website. However, as long as you keep the file size of each image under 100KB, you should be able to have 10 or more images on a page and still have it load in under one second – assuming your viewers have a reasonable high speed internet connection.
Steps to Add an Image to Your Home Page
Before we add an image to our home page, we first need to optimize or reduce the file size of the image and then place the image in our images folder. Copy any image to a Writer document. Then right click on the image and click Compress. Then click OK.
Then right click again on the image and click Save. Then navigate to your website root folder and open your images folder. Name the image my_first_image and click save. The image by default will be saved as a JPG file.
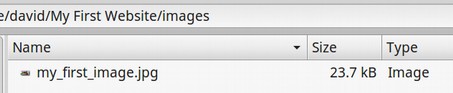
Note that the file size is only 23.7 KB. Now add a new line to our index.html file and type “Here is a copy of the first image ever placed on the internet.”
Select the sentence and click on the Paragraph tag icon to place paragraph tags around this sentence. Then enter a new line and click on the Insert Image icon which is on the Standard tab.
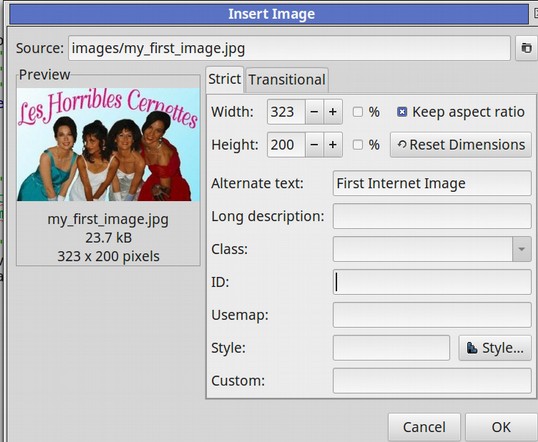
Click on the File Manager icon and navigate to the image. For Alternate Text, type in First Internet Image. Here is what the Insert Image window will look like after selecting your image.
Click OK. Here is the HTML for this image.

There are several unusual things about the image tag. The biggest is that there is no content with an image. Also, there is no closing tag for an image tag. There is simply the attribute src=”images/my_first_image.jpg” followed by the width, height and alt attributes. Click File Save, then view the file in your web browser.
While Bluefish has used the relative URL to this image by default, it would be better to use the absolute URL. Copy the URL for your Home page: file:///home/david/My%20First%20Website/index.html
Then copy it again and replace /index.html with /images/my_first_image.jpg

file:///home/david/My%20First%20Website/images/my_first_image.jpg
This is the absolute file name for this image. Enter a new line and type: “This is the same image with an absolute URL: “
Then enter a new line but do not click on the Insert Image icon. Instead enter the beginning letters of the image tag. Bluefish will bring up a window with some options. Use these hints to finish typing <img src=”” alt=””>.
Then carefully place your cursor between the two parenthesis to the right of the source equals sign. Then in the top menu, click on Tools, Insert, Absolute File Name. This will bring up your File Manager. Navigate to the image you want to add and select it. Verify that the URL that was entered matches the absolute URL above. For alt text, carefully place your cursor between the parentheses and type in Absolute URL Image. Click OK. Then save the file and view it in the browser. You will now see two images. Note that you do not need to specify the width and height of the image unless you want to change its size. But you should always include the Alternate Text as some browsers have images turned off by default.
How to Center an Image
The modern way to center images is to use a CSS style sheet. However, since we have not yet covered CSS, and since with a small website with just a couple of images, you may not even bother with a style sheet, here we will review the manual way of centering images. Simply insert the following attribute into the image tag for the images you want to center. style="display: block; margin-left: auto; margin-right: auto;"
We will add this to our final image on the home page right after the Alt text and just before the closing image tag.
What’s Next?
This concludes our introduction to the image tag attributes. In the next lesson, we will take a closer look at how to specify and use colors on web pages.