
In the last lesson, we used a Text Editor to create a web page. In this lesson, we will create a web page using the Bluefish Editor.
Using Bluefish to make a web page
A long time ago, people used to use HTML and a simple text editor to create web pages- just like you just did. Writing HTML with a text editor takes a lot of time because each opening and closing tag has to be typed in manually. Because it takes a lot of time and we want to make learning HTML easier, we have a better way to do things. We will use an open source code editor called Bluefish.
Bluefish adds the HTML tags for us and allows us to quickly view our progress while at the same time helping us to learn HTML. With Bluefish we don’t have to actually type in the opening and closing brackets. <YAY!>
You do not need a license to download and run Bluefish. If you have a Windows or Apple computer, you can download Bluefish from the Bluefish download page: http://bluefish.openoffice.nl/download.html
If you have a Linux Mint computer, just open the Software Manager and type Bluefish in the Search Box. Then click on Bluefish and click INSTALL. Either way when you open Bluefish, you will see this Editor screen.
The Bluefish Editor Screen
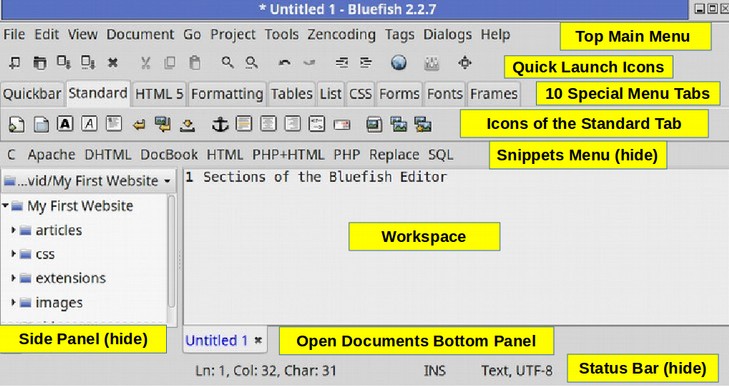
This screen looks complicated– even intimidating with all of its options. But most of these options are rarely used.
Because we want to focus on the workspace, we will hide the Side Panel, Status Bar and Snippets menu. These can all be re-opened with a click of a button if and when we need them. This will create a much simpler interface.
Sections of the Simplified Bluefish Editor
To hide the Side Panel – Click on the View Menu Item in the Top Main Menu, then un-check the Side Panel, Status Bar and Snippets Menu. This is the Bluefish Editor after hiding the Side Panel and Status Bar.
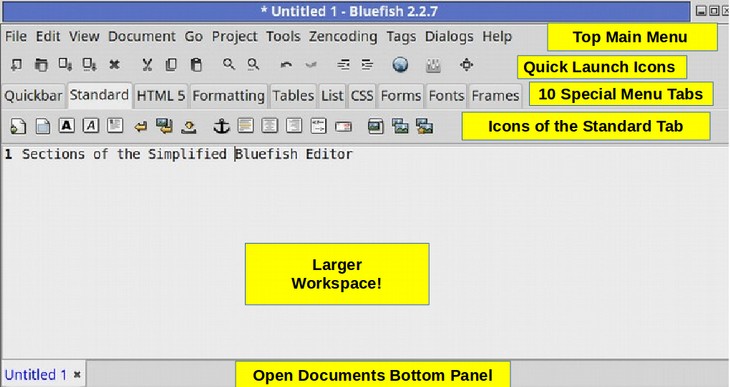
This important change will help us focus on the workspace.
Make an HTML Document with a the Bluefish Editor
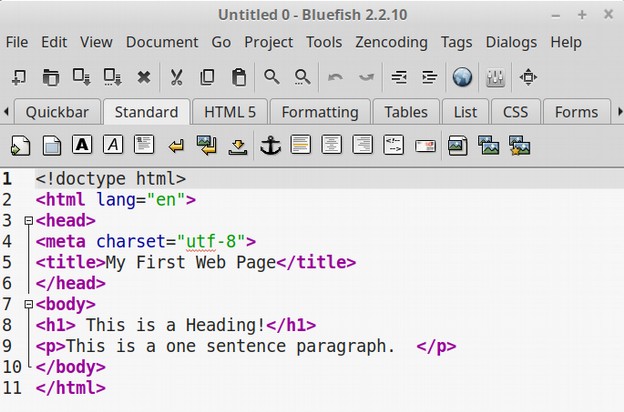
When you open the Bluefish editor, you should find the following already on your screen.
If the screen is blank, copy and paste this into it:
<!doctype html>
<html lang="en">
<head>
<meta charset="utf-8">
<title>My First Web Page</title>
</head>
<body>
<h1> This is a Heading </h1>
<p>This is a one sentence paragraph. </p>
</body>
</html>
Notice that the doctype should be set for html and the character encoding or charset should be set for utf-8. These are required for all real HTML files.
There are also several HTML tags already added to this document. But you did not need to remember or type in any of these HTML tags because the Bluefish editor did all of this for you. What you are seeing is called the default HTML5 Template. A template is a pre-made HTML document that you can modify however you want.
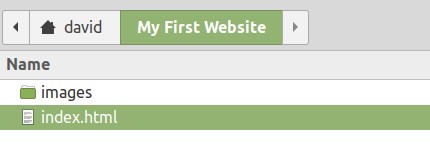
Save the file as an html file in your website root folder by clicking on File, Save As in the Bluefish top menu. This will bring up your file manager. Click on your website root folder to open it. Before you save the file, change the name from Untitled 0 to index.html Then click Save. Open your file manager. Here is what our index.html file now looks like in our file manager:
Right click on the index.html file and open it with your Web Browser.
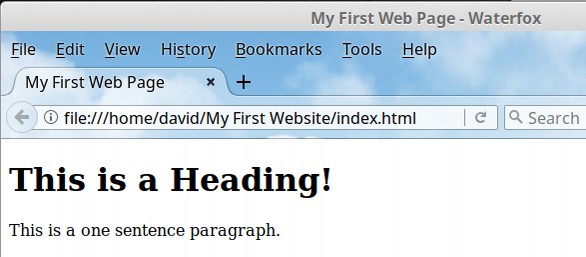
Congratulations! You have made your first official web page – and you did it without typing in a single HTML tag!

How do you feel about yourself now that you can create a web page? Give yourself a pat on the back!!
Let’s look more closely at our HTML document
Now close your web browser. Let’s go back to our Bluefish workspace screen and take a quick look at the parts or components of an HTML document. Here is our initial Bluefish workspace screen:
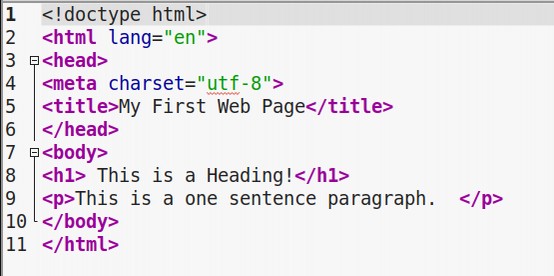
There are 11 lines. What do these lines mean?
Structure of an HTML Document
An HTML document typically includes the following four parts:
#1 DOCTYPE… telling the browser this is an HTML document.
#2 HTML ELEMENT... opening the HTML document
#3 HEAD… including the meta data of the HTML document.
#4 BODY… including the visible content of the HTML document.
Let’s take another look at our default Bluefish document to see if we can find these four parts.
#1 DOCTYPE… Tells the browser this is an HTML document. Line 1 is the only sentence with an opening tag <> but no closing tag. Here is what the doctype should always look like:<!doctype html> (There is a closing bracket but not a closing tag!)
#2 HTML ELEMENT Opens the HTML document. Line 2 has an opening tag that also tells the browser what language to use. Whenever there is a statement such as lang equals followed by a property in parenthesis it is called an attribute. The attribute here is “en” …. that means we want the English language. This is the language attribute for the html element.
< html lang=”en”>The closing html tag for line 2 is on line 11: </html>
#3 HEAD opening tag: <head> Each HTML document can have only one HEAD element and one BODY element. Line 3 is the opening tag for the head of the document. Line 4 is a meta data statement telling the browser to use the utf 8 character set. This is the standard character encoding declaration: <meta charset=utf-8”>
Line 5 is the meta data title of the document that will appear in the top of the browser window. Meta key words and descriptions can also be added here as we will do later.
<title>My First Web Page</title>
Line 6 is the closing tag for the head of the document. </head>
#4 BODY tag (also called the BODY element) signals the beginning of the visible content of the HTML document. Line 7 is the opening tag for the body of the document: <body>
Line 8 begins with a heading opening tag which is also called an element.
<h1> This is a Heading!</h1>
Each HTML document should only have one H1 element – but it can have as many sub-headings as you want. So no limit on H2, H3, etc.
Line 9 begins with a paragraph opening tag. This is followed by a one sentence paragraph. Then Line 9 ends with a paragraph closing tag.
<p>This is a one sentence paragraph. </p>
The paragraph tag is also called an Element. Line 10 is the body closing tag and Line 11 is the html document closing tag.

The HTML tags are placed around the content to help the browser decide how to display the content.
What’s Next?
Now that we have a better understanding of the Bluefish Editor, in the next article we will take a closer look at the two most common HTML tags. These are the Heading and Paragraph tags.